
Creating a website that ensures accessibility for everyone
How can we make our website more accessible for everyone?
Creating a website that ensures accessibility for everyone is a wonderful and impactful way to connect with a wide range of users. By prioritizing accessibility, you can make sure that people of all abilities can engage with your content and services, ultimately promoting inclusivity and diversity in the online space. Taking the time to consider various aspects of accessibility, such as providing alternative text for images, implementing proper color contrast, and ensuring keyboard navigation, can significantly improve the user experience for individuals with disabilities. Additionally, incorporating features like closed captioning for videos and descriptive links can further enhance the inclusivity of your website.
Ways in which Webflow is already contributing to accessibility
Weblfow is always working hard to improve their elements to include native accessibility features. They also provide robust tools for auditing and additional features to help you build a more accessible website. This commitment to accessibility ensures that users of all abilities can easily access and interact with your website, creating a more inclusive online experience for everyone.
Some of my favorite features include:
Clean, semantic code
Webflow is awesome because it brings the power of HTML and CSS into a visual canvas, making it super easy for you to create accessible designs that produce clean, semantic code.
Alt text attributes
This setting feature makes sure your images have alternative (alt) text attributes, or you can set them as decorative images.
Set HTML5 tags
Webflow makes it easy for you to set your elements to the right HTML5 tag so that assistive technology can effectively relay your page structure to visitors.
Relative units
With the option to use relative units such as rems, percentages, viewport height, and character count you can create readable and responsive typography.
Flexible custom code options
Webflow provides the freedom to add code as needed to set custom attributes, control markup, set custom focus states, and more.
Working with the accessiBe platform and Webflow
Ease of Implementation:
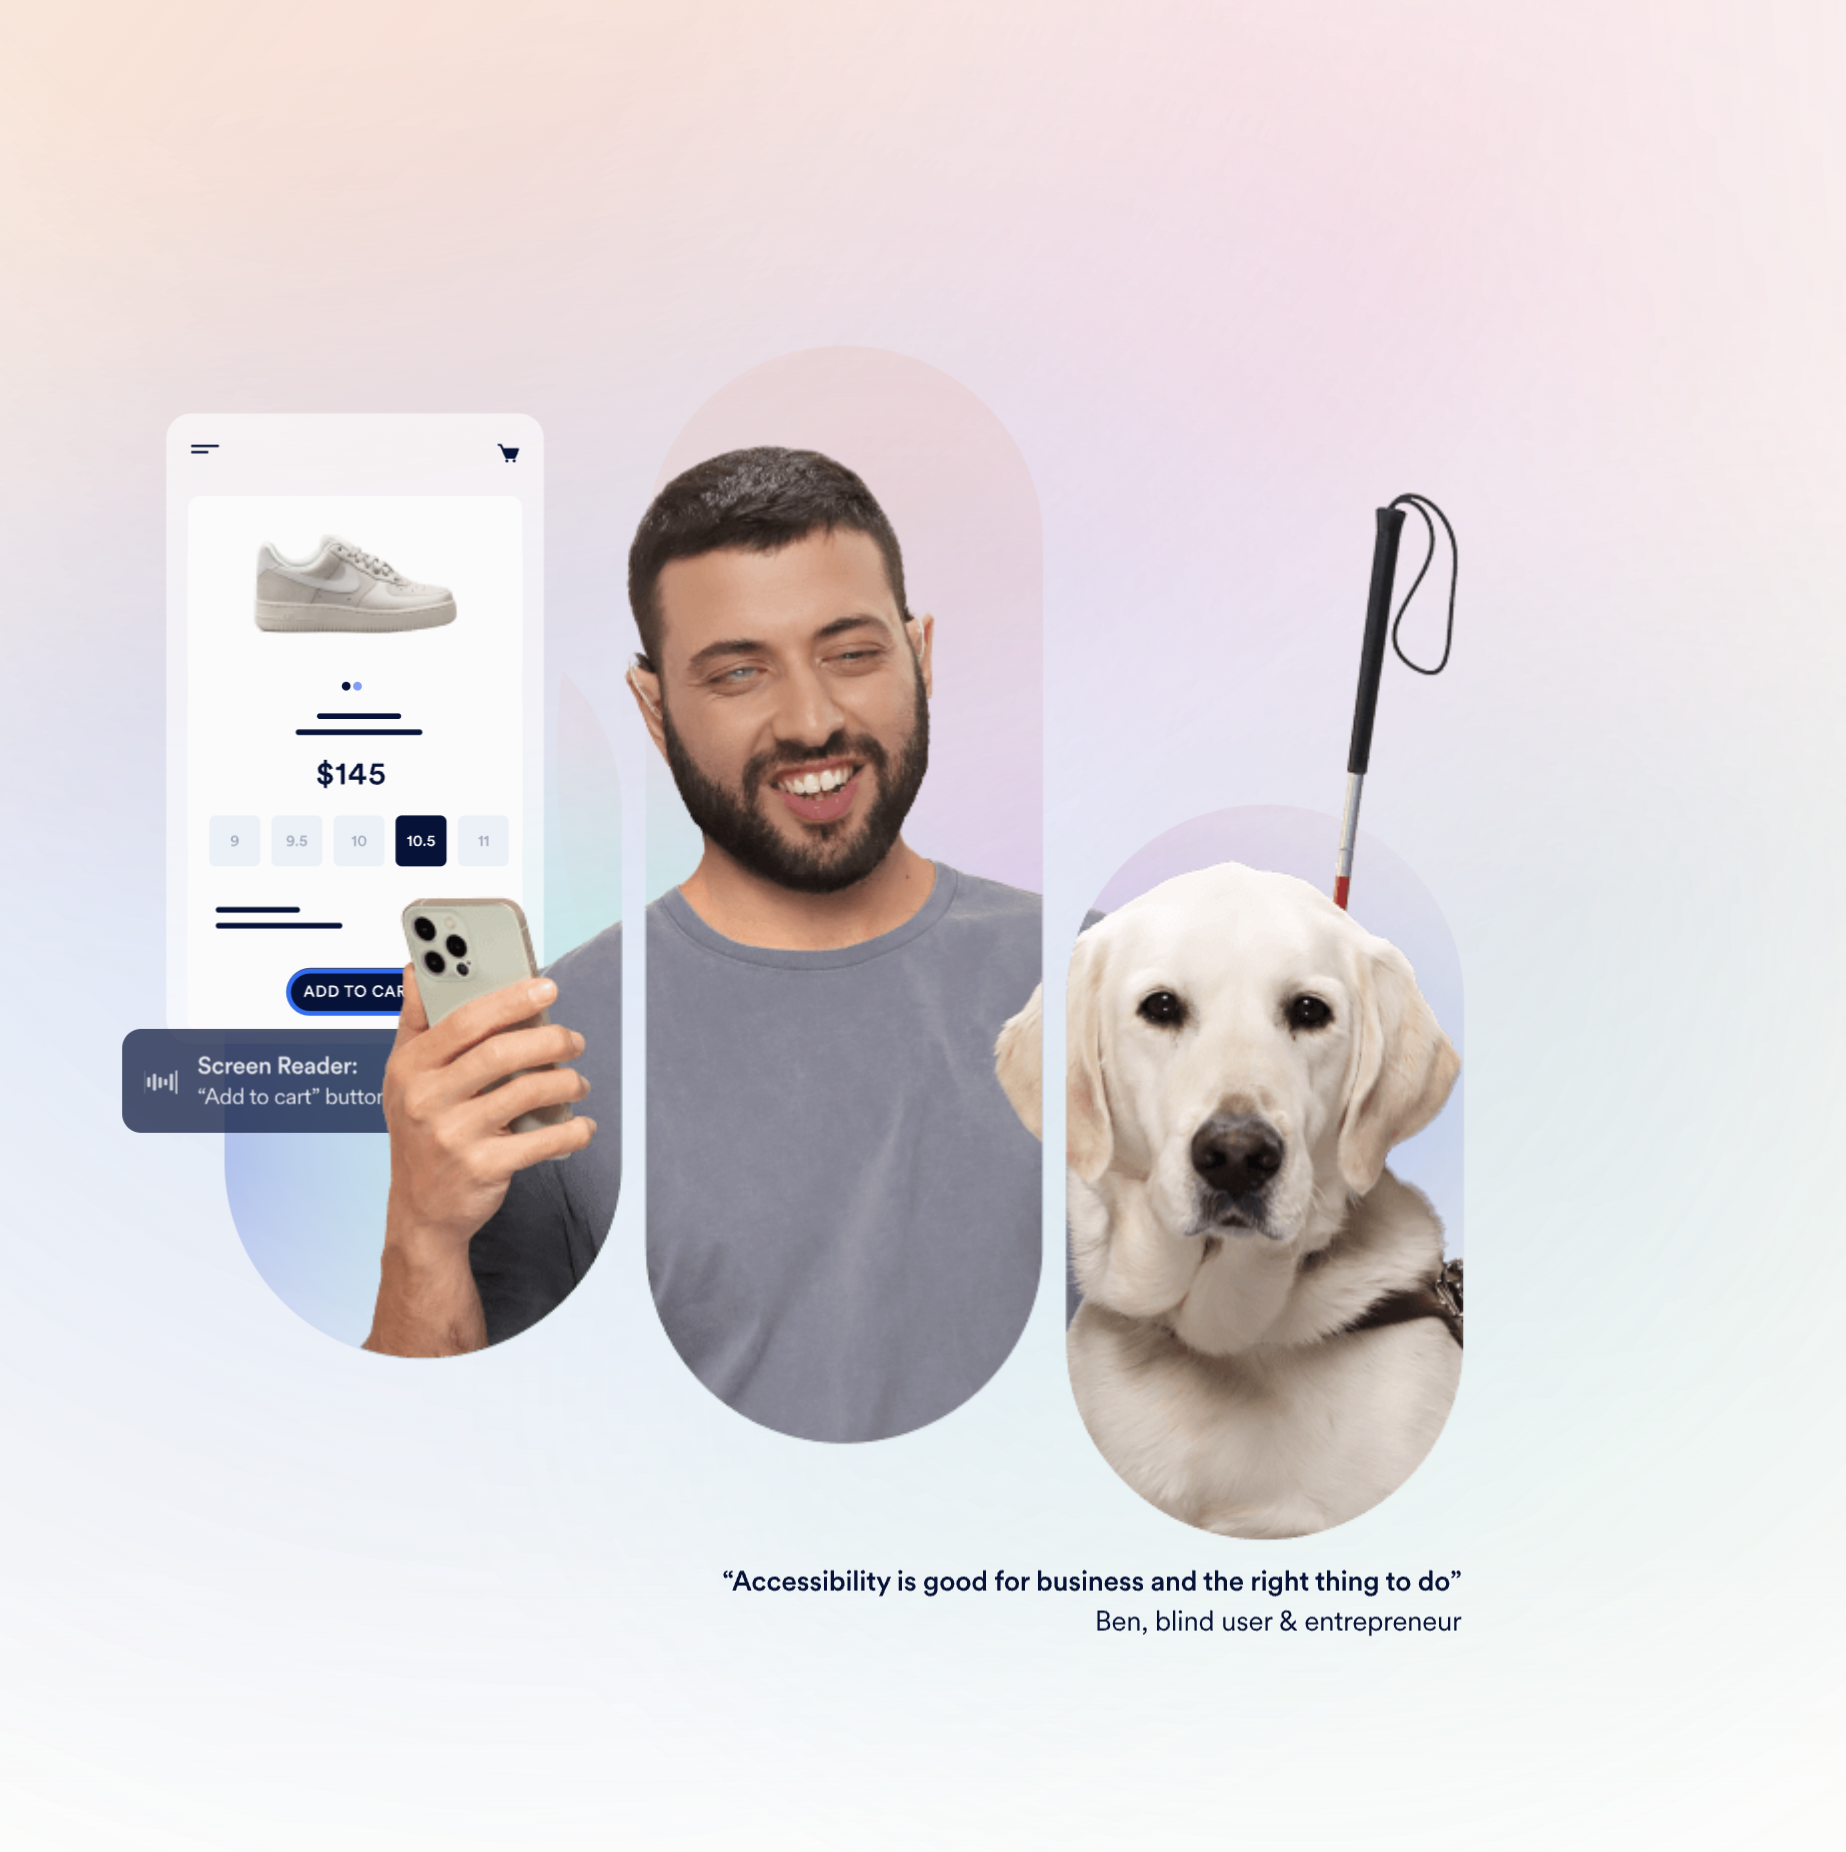
For individuals lacking technical expertise, accessiBe provides an accessible and user-friendly solution. The accessWidget, a pivotal tool developed by accessiBe, can be seamlessly integrated into a Webflow site by inserting a small custom code snippet before the closing </body> tag.
The tool does a great job of automating different parts of the accessibility compliance process by scanning and making modifications to the website, ensuring that it follows the latest Web Content Accessibility Guidelines (WCAG 2.1). These modifications include adjustments to code that might be a bit trickier for the average Webflow user to tackle on their own.
Benefits and Looking Back:
Once accessiBe is set up, it simply scans the website every 24 hours to ensure everything is up to date and addresses any new issues that may arise. So, once you've got accessiBe all set, you can rest easy knowing that it pretty much takes care of everything. All good!
accessiBe's Awesome Customization Features for Webflow!
accessiBe offers a wide range of customization options that allow users to perfectly match accessibility features with their brand identity while using Webflow which also includes the Webflow ADA compliance app which can be access directly through the Webflow designer interface. These customization capabilities include:
Users can personalize the widget to match their website's color palette, right down to the colors of the buttons.
Placement: You can easily adjust the accessibility widget's position on the page to make sure it doesn't interfere with other important elements of the website design.
Text: Default Text and Language Options: You can customize the widget's default text and choose from a variety of language settings to make sure it's perfect for your audience.
Button Icons: You have the option to choose from about 10 different icons for the button that activates the accessibility options, adding extra visual customization.
Mobile Settings: For mobile devices there are specific settings that can be optimized to make accessibility features even better. By doing this, you can ensure a consistent experience across all platforms.
Limitation
accessiBe makes it super easy to make your Webflow website accessible to a wider audience, addressing short-term and long-term compliance issues, even if you're not super tech-savvy. This tool does all the heavy lifting to help you meet ADA website compliance. While it does have a limitation with custom fonts and takes upto 48hrs to recieve a scanned report of the website, I'd totally recommend it to my clients. For more information, be sure to check out accessiBe's comprehensive guide on enhancing accessibility for your Webflow website here.
Final Thoughts
accessiBe makes it super simple to ensure that your Webflow website is accessible to a wider range of users, covering both immediate and ongoing compliance worries. It's designed to take care of most of the work for you, so you can easily meet ADA website compliance.
For even more help, feel free to check out accessiBe's fantastic, in-depth guide on making your Webflow website accessible here.
*This article was written in collaboration with accessiBe.
How to add accessiBe widget to your website
~ 1. Simply tap here on the start your free trial to begin the signup!
~2. Either choose "Continue with Google" or simply enter your information below to move forward.
~3. You're all set to complete the setup process by entering your personal details, like your name, email address, and preferred password. After you've provided this information, simply click on the "Sign up" button to create your account.

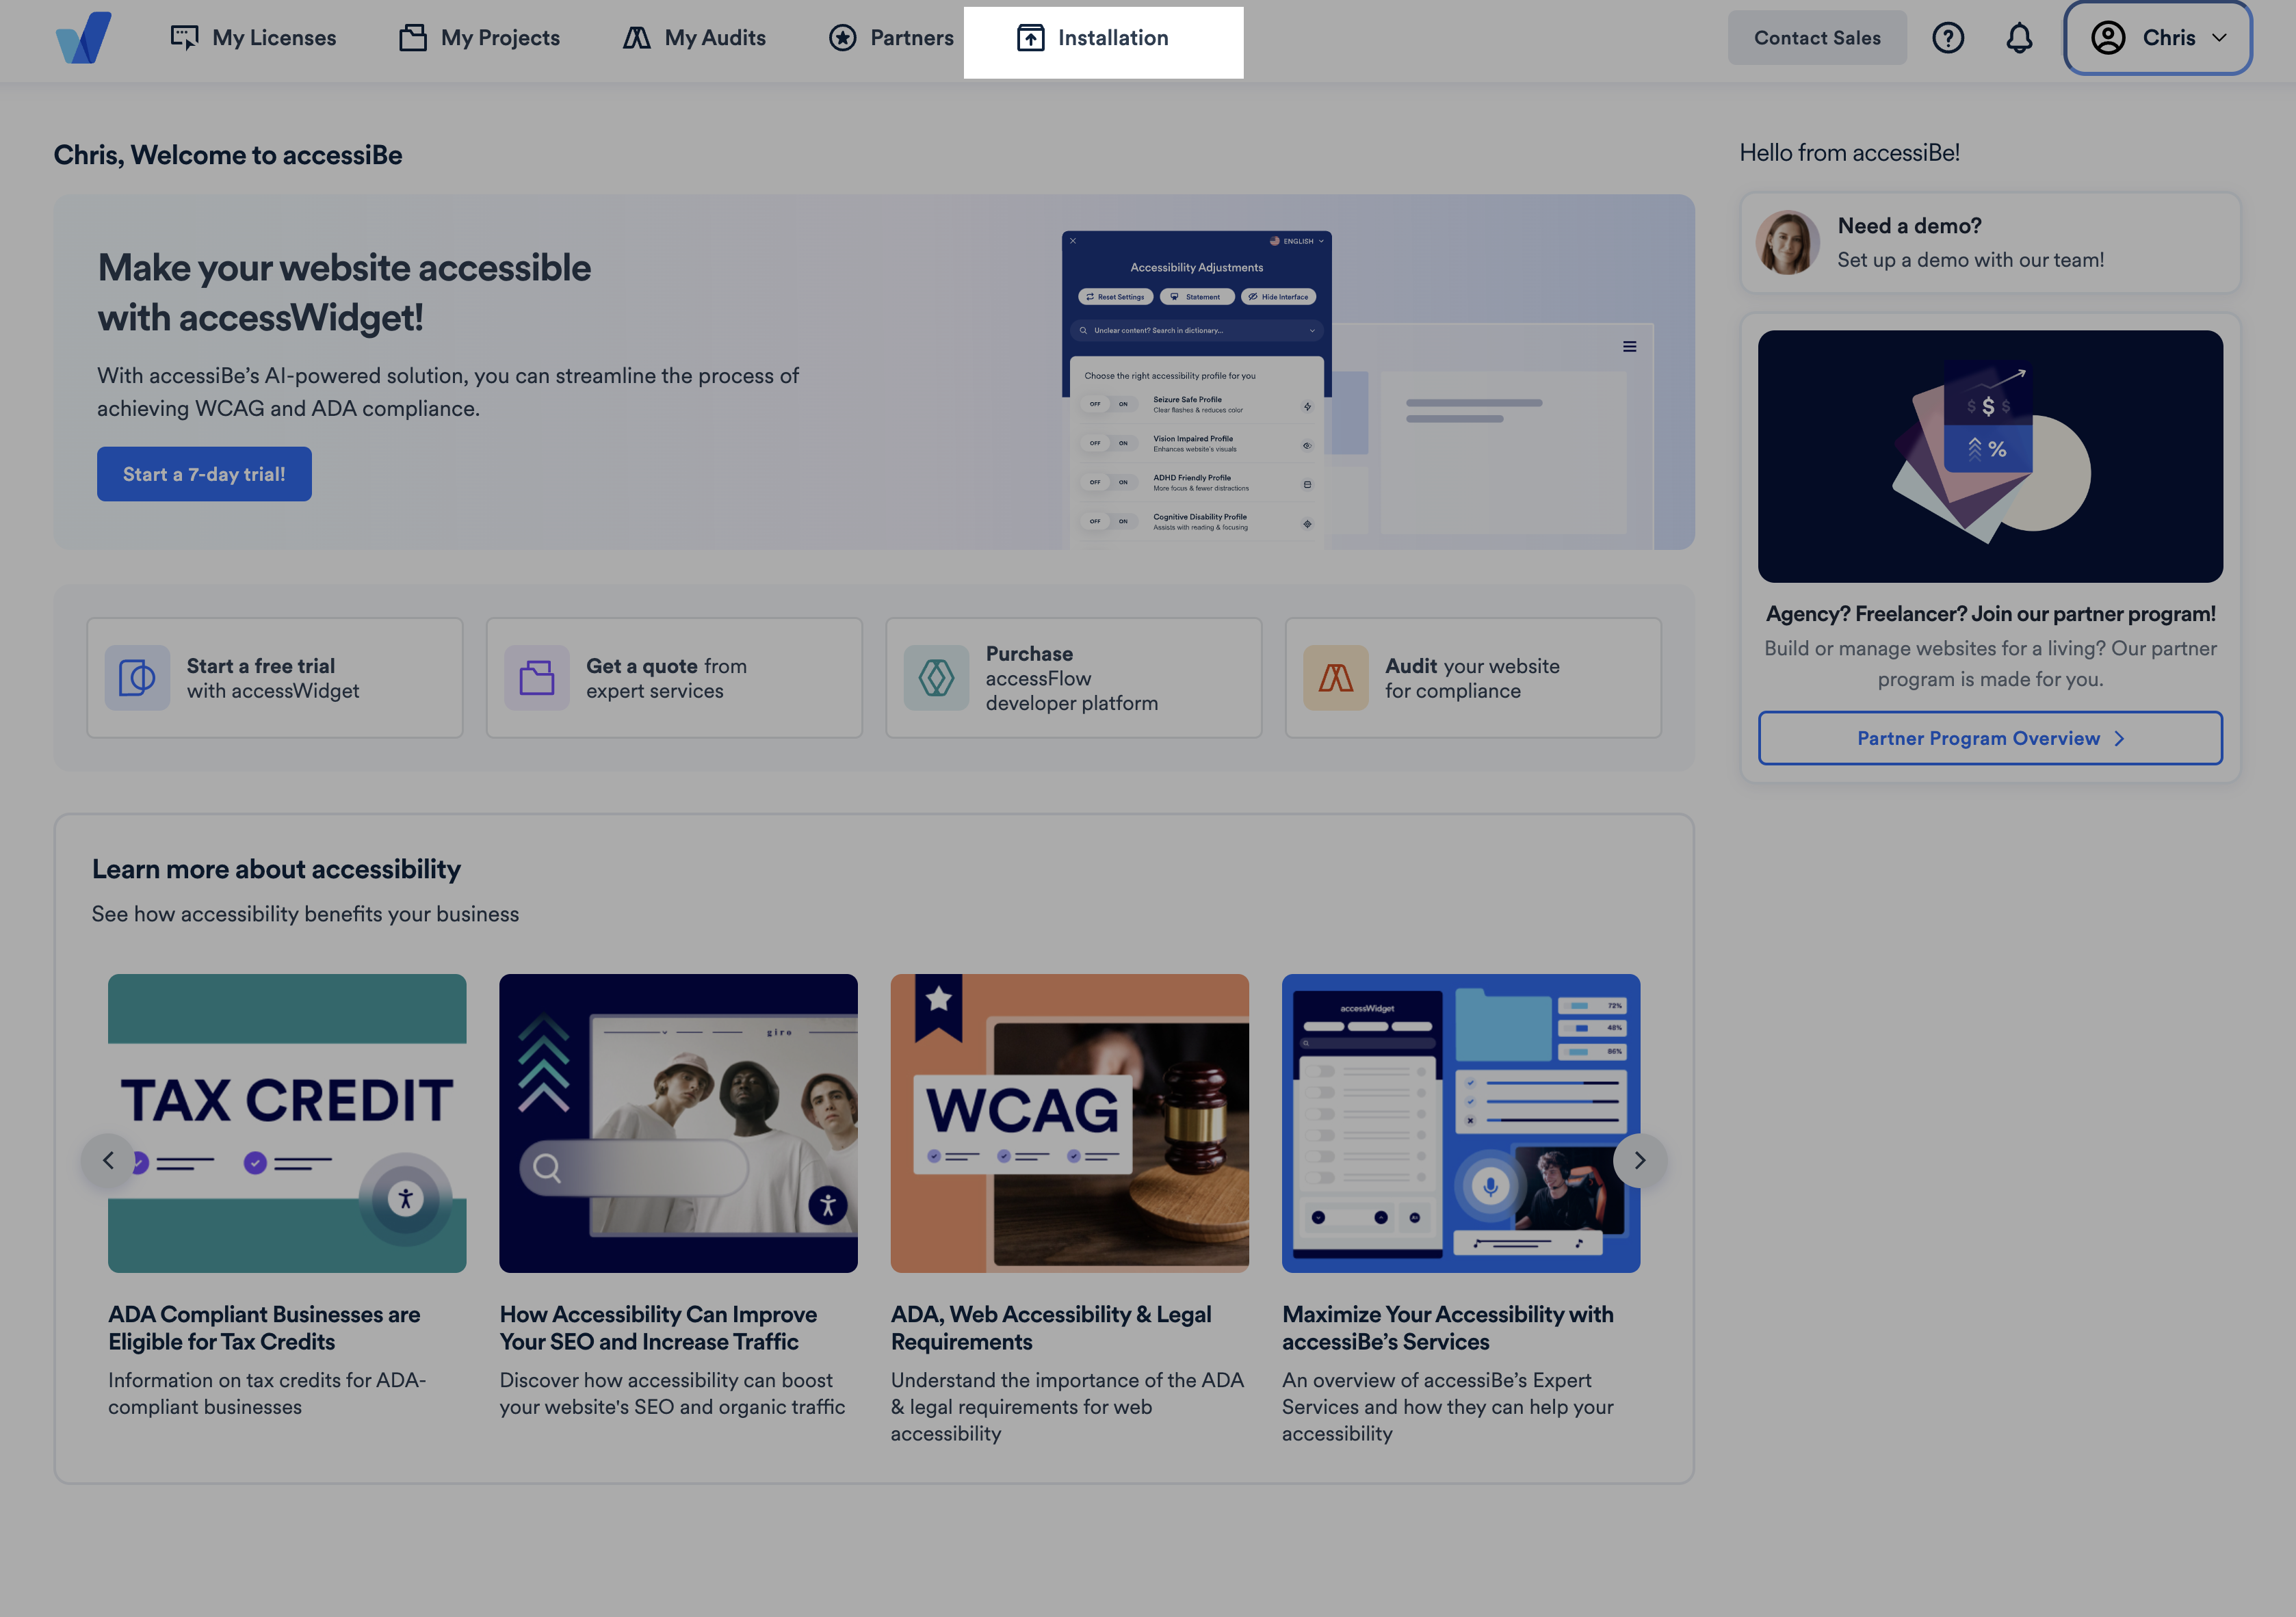
~4. You can find the Installation button right in the navigation bar at the top of the dashboard. Simply click on this button to start the installation process for accesiBi.
~5. Please go ahead and choose the "Copy to Clipboard" option to save the code needed for Webflow.
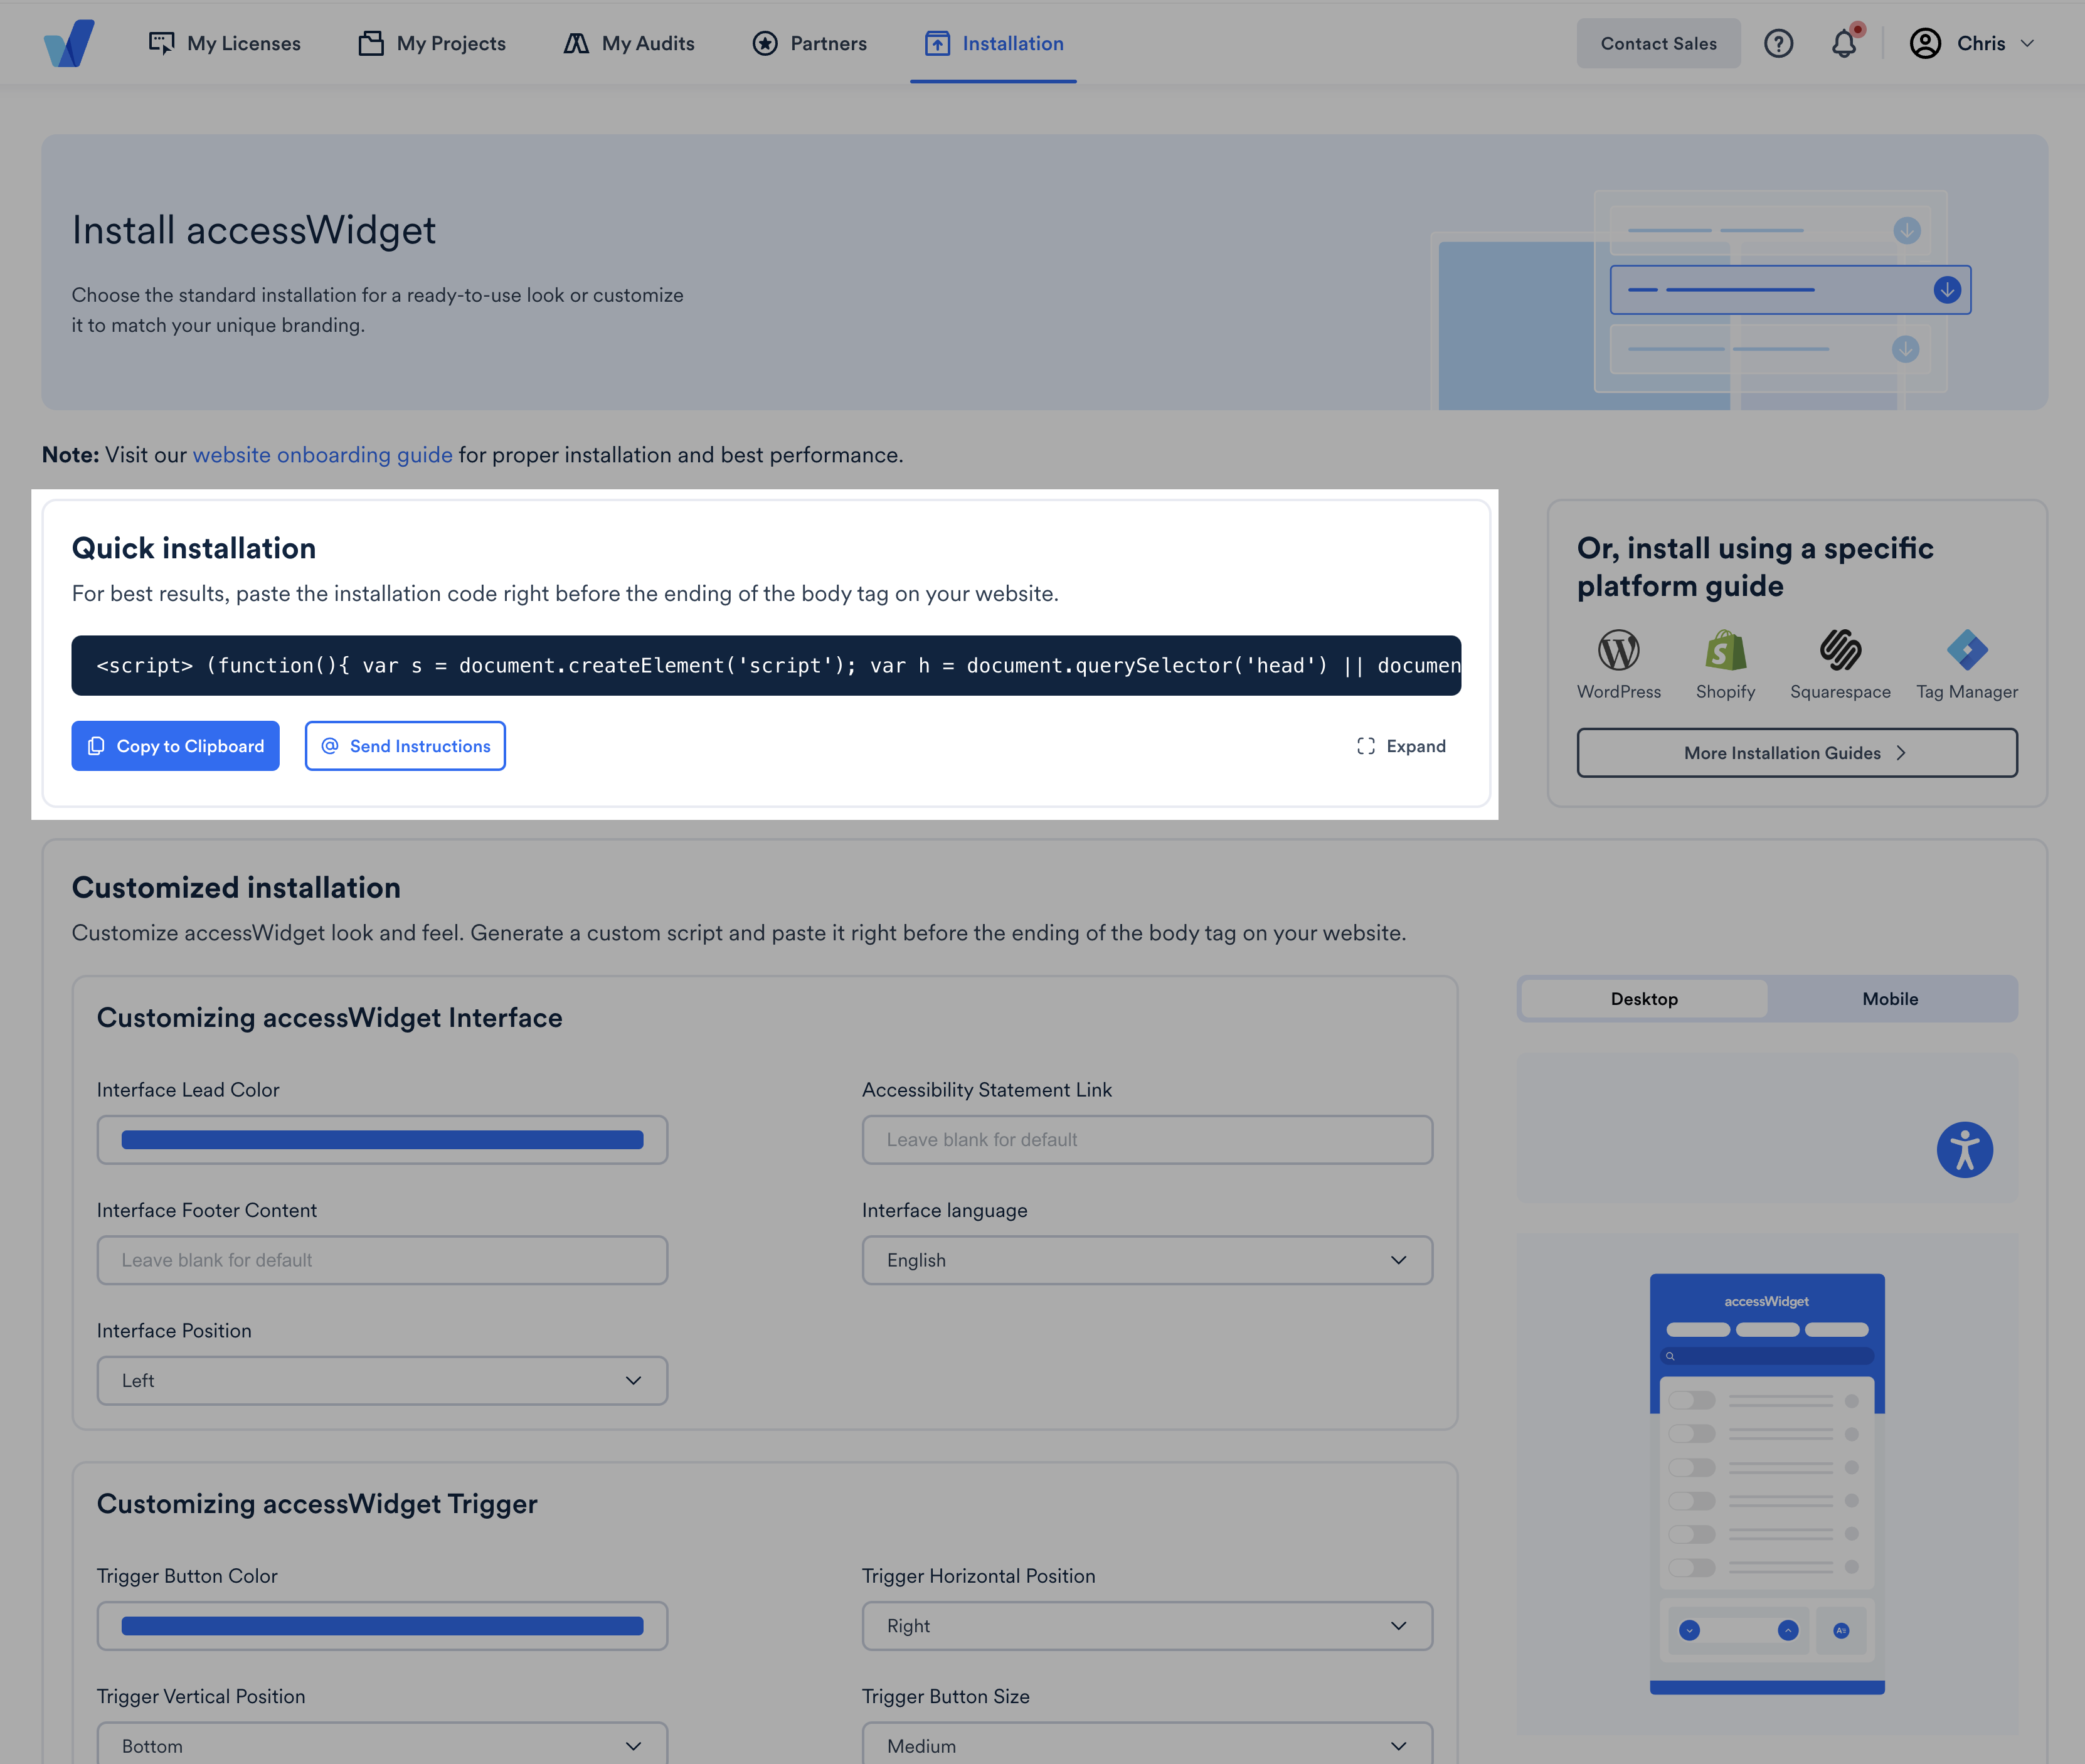
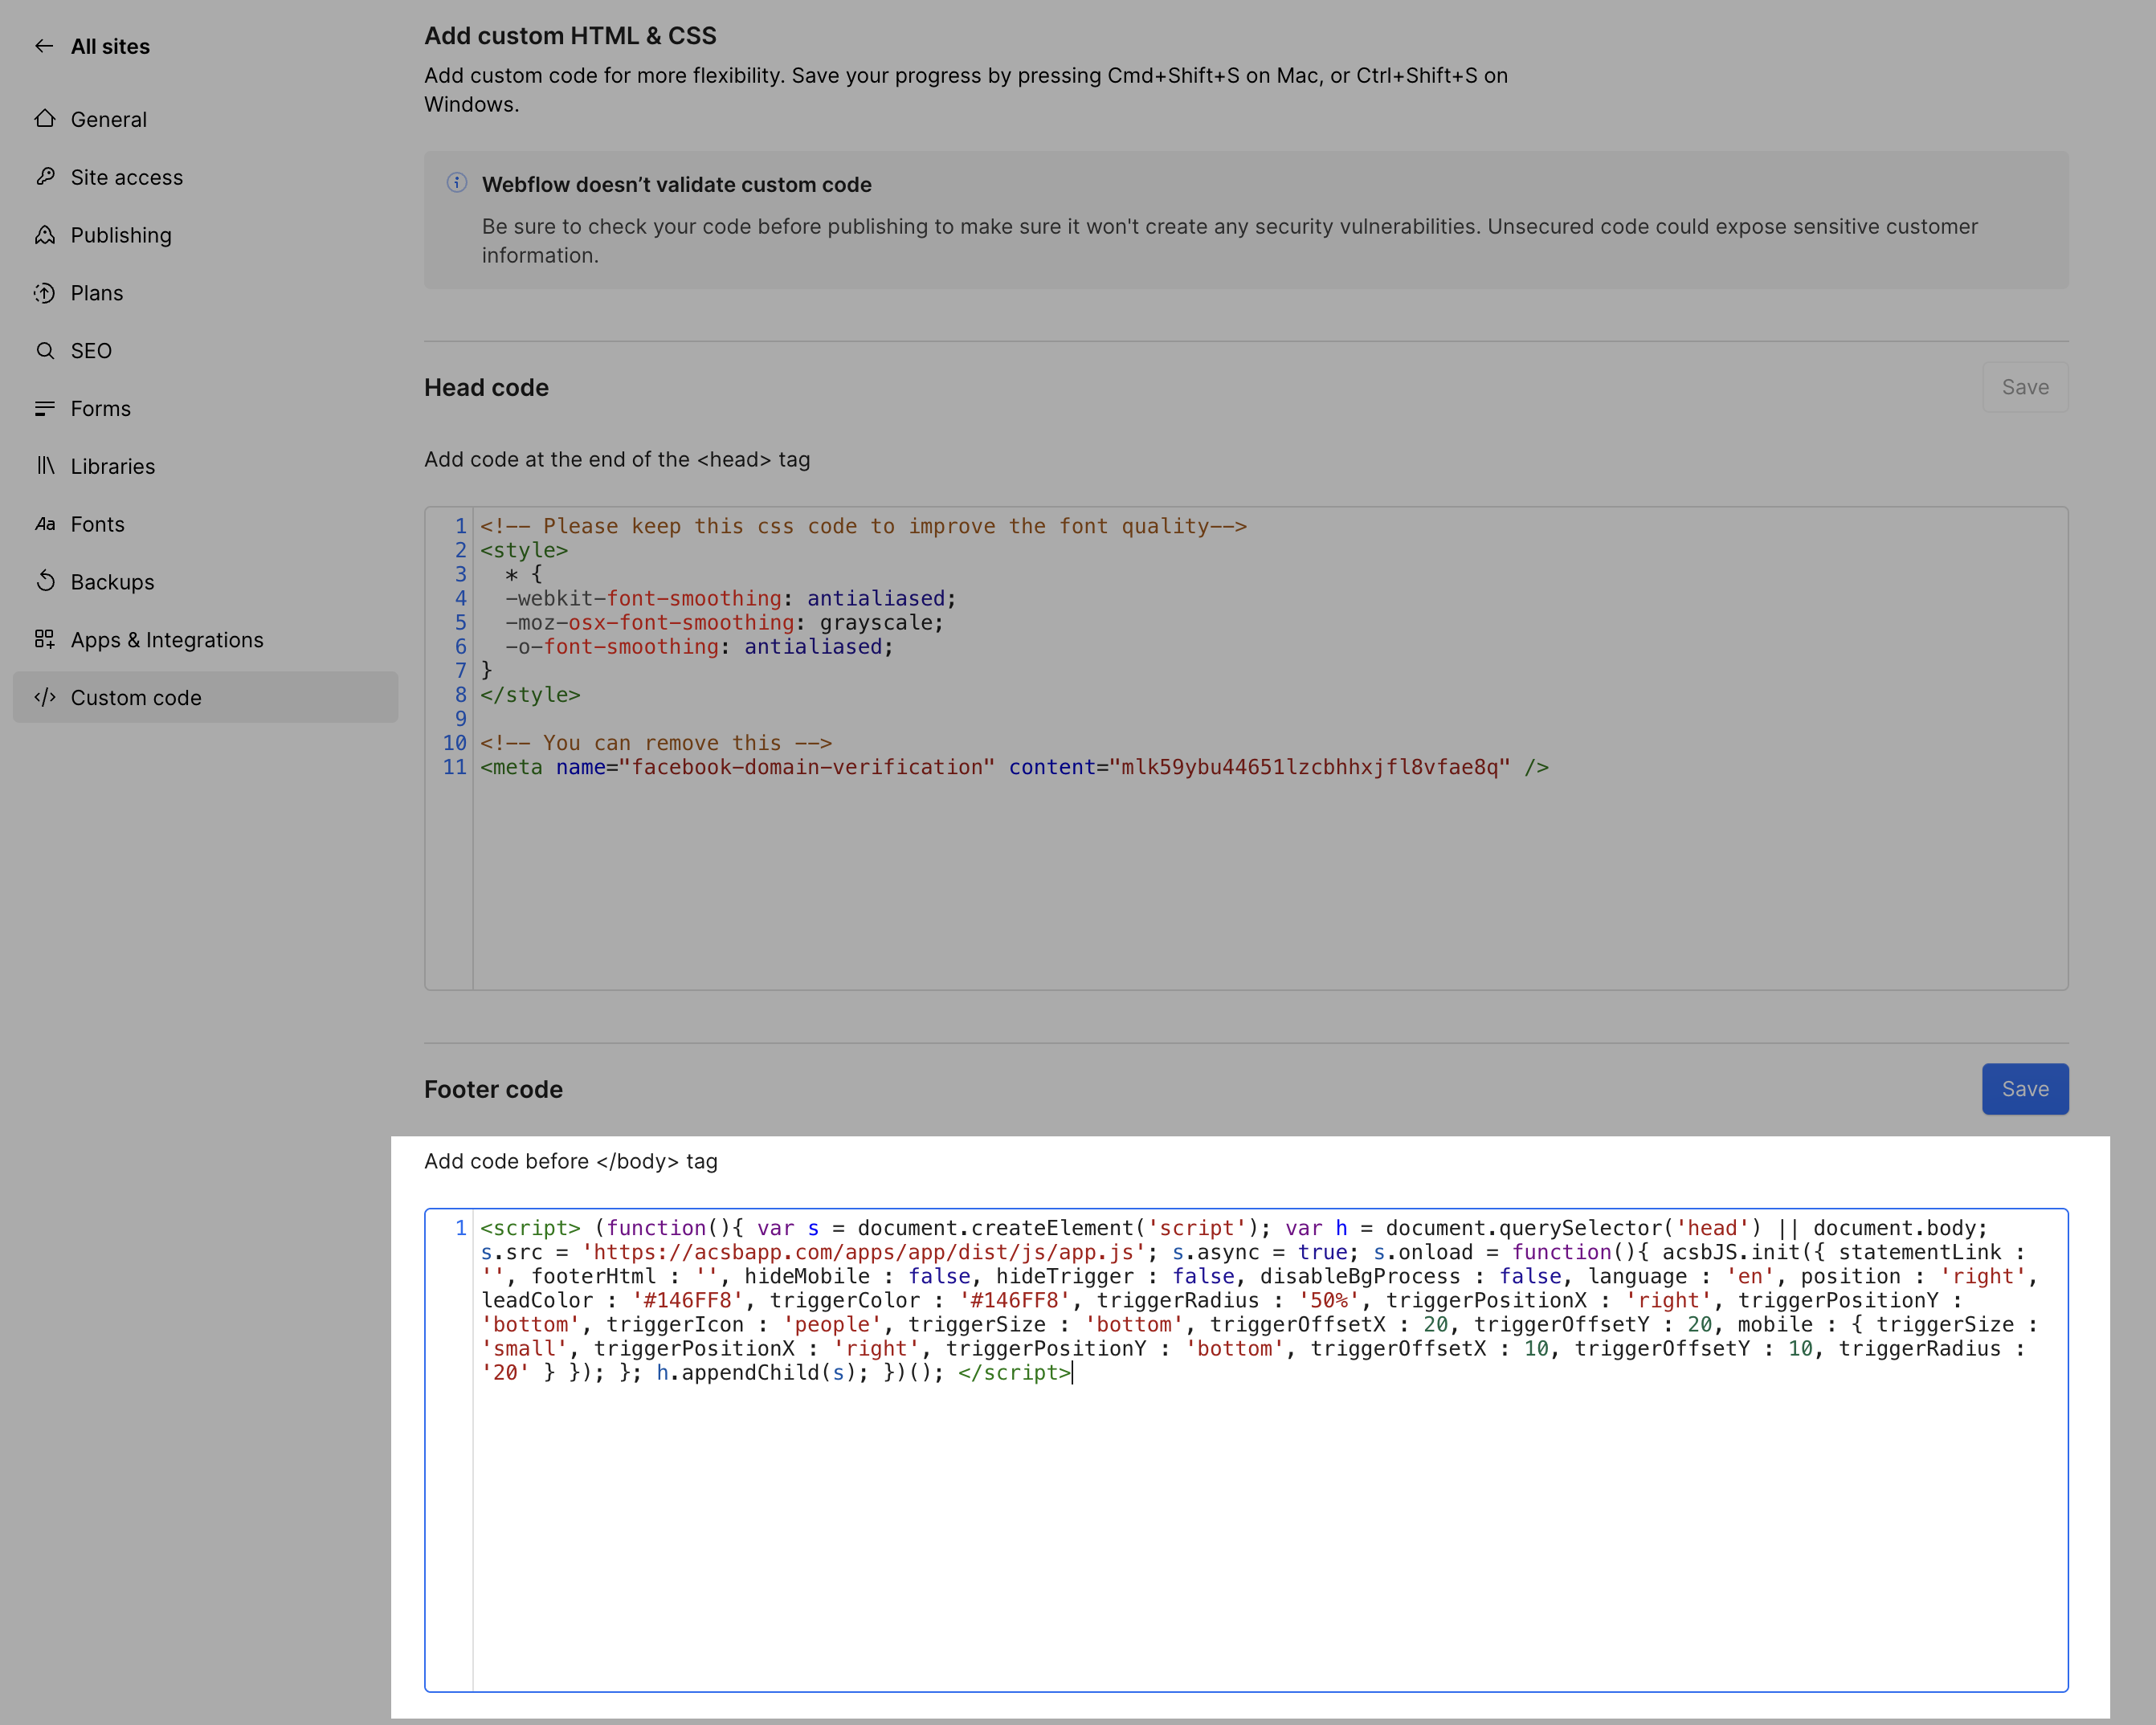
~6. Head over to your Webflow dashboard and pick the specific site where you'd like to add the accesiBi widget. After you've chosen the site, just head to the settings section within the dashboard interface.
~7. Choose the custom code tab, located in the site settings section of the interface.

~8. Paste the code that you copied earlier from the installation tab of accesiBi into the "Add code before </body> tag" box.
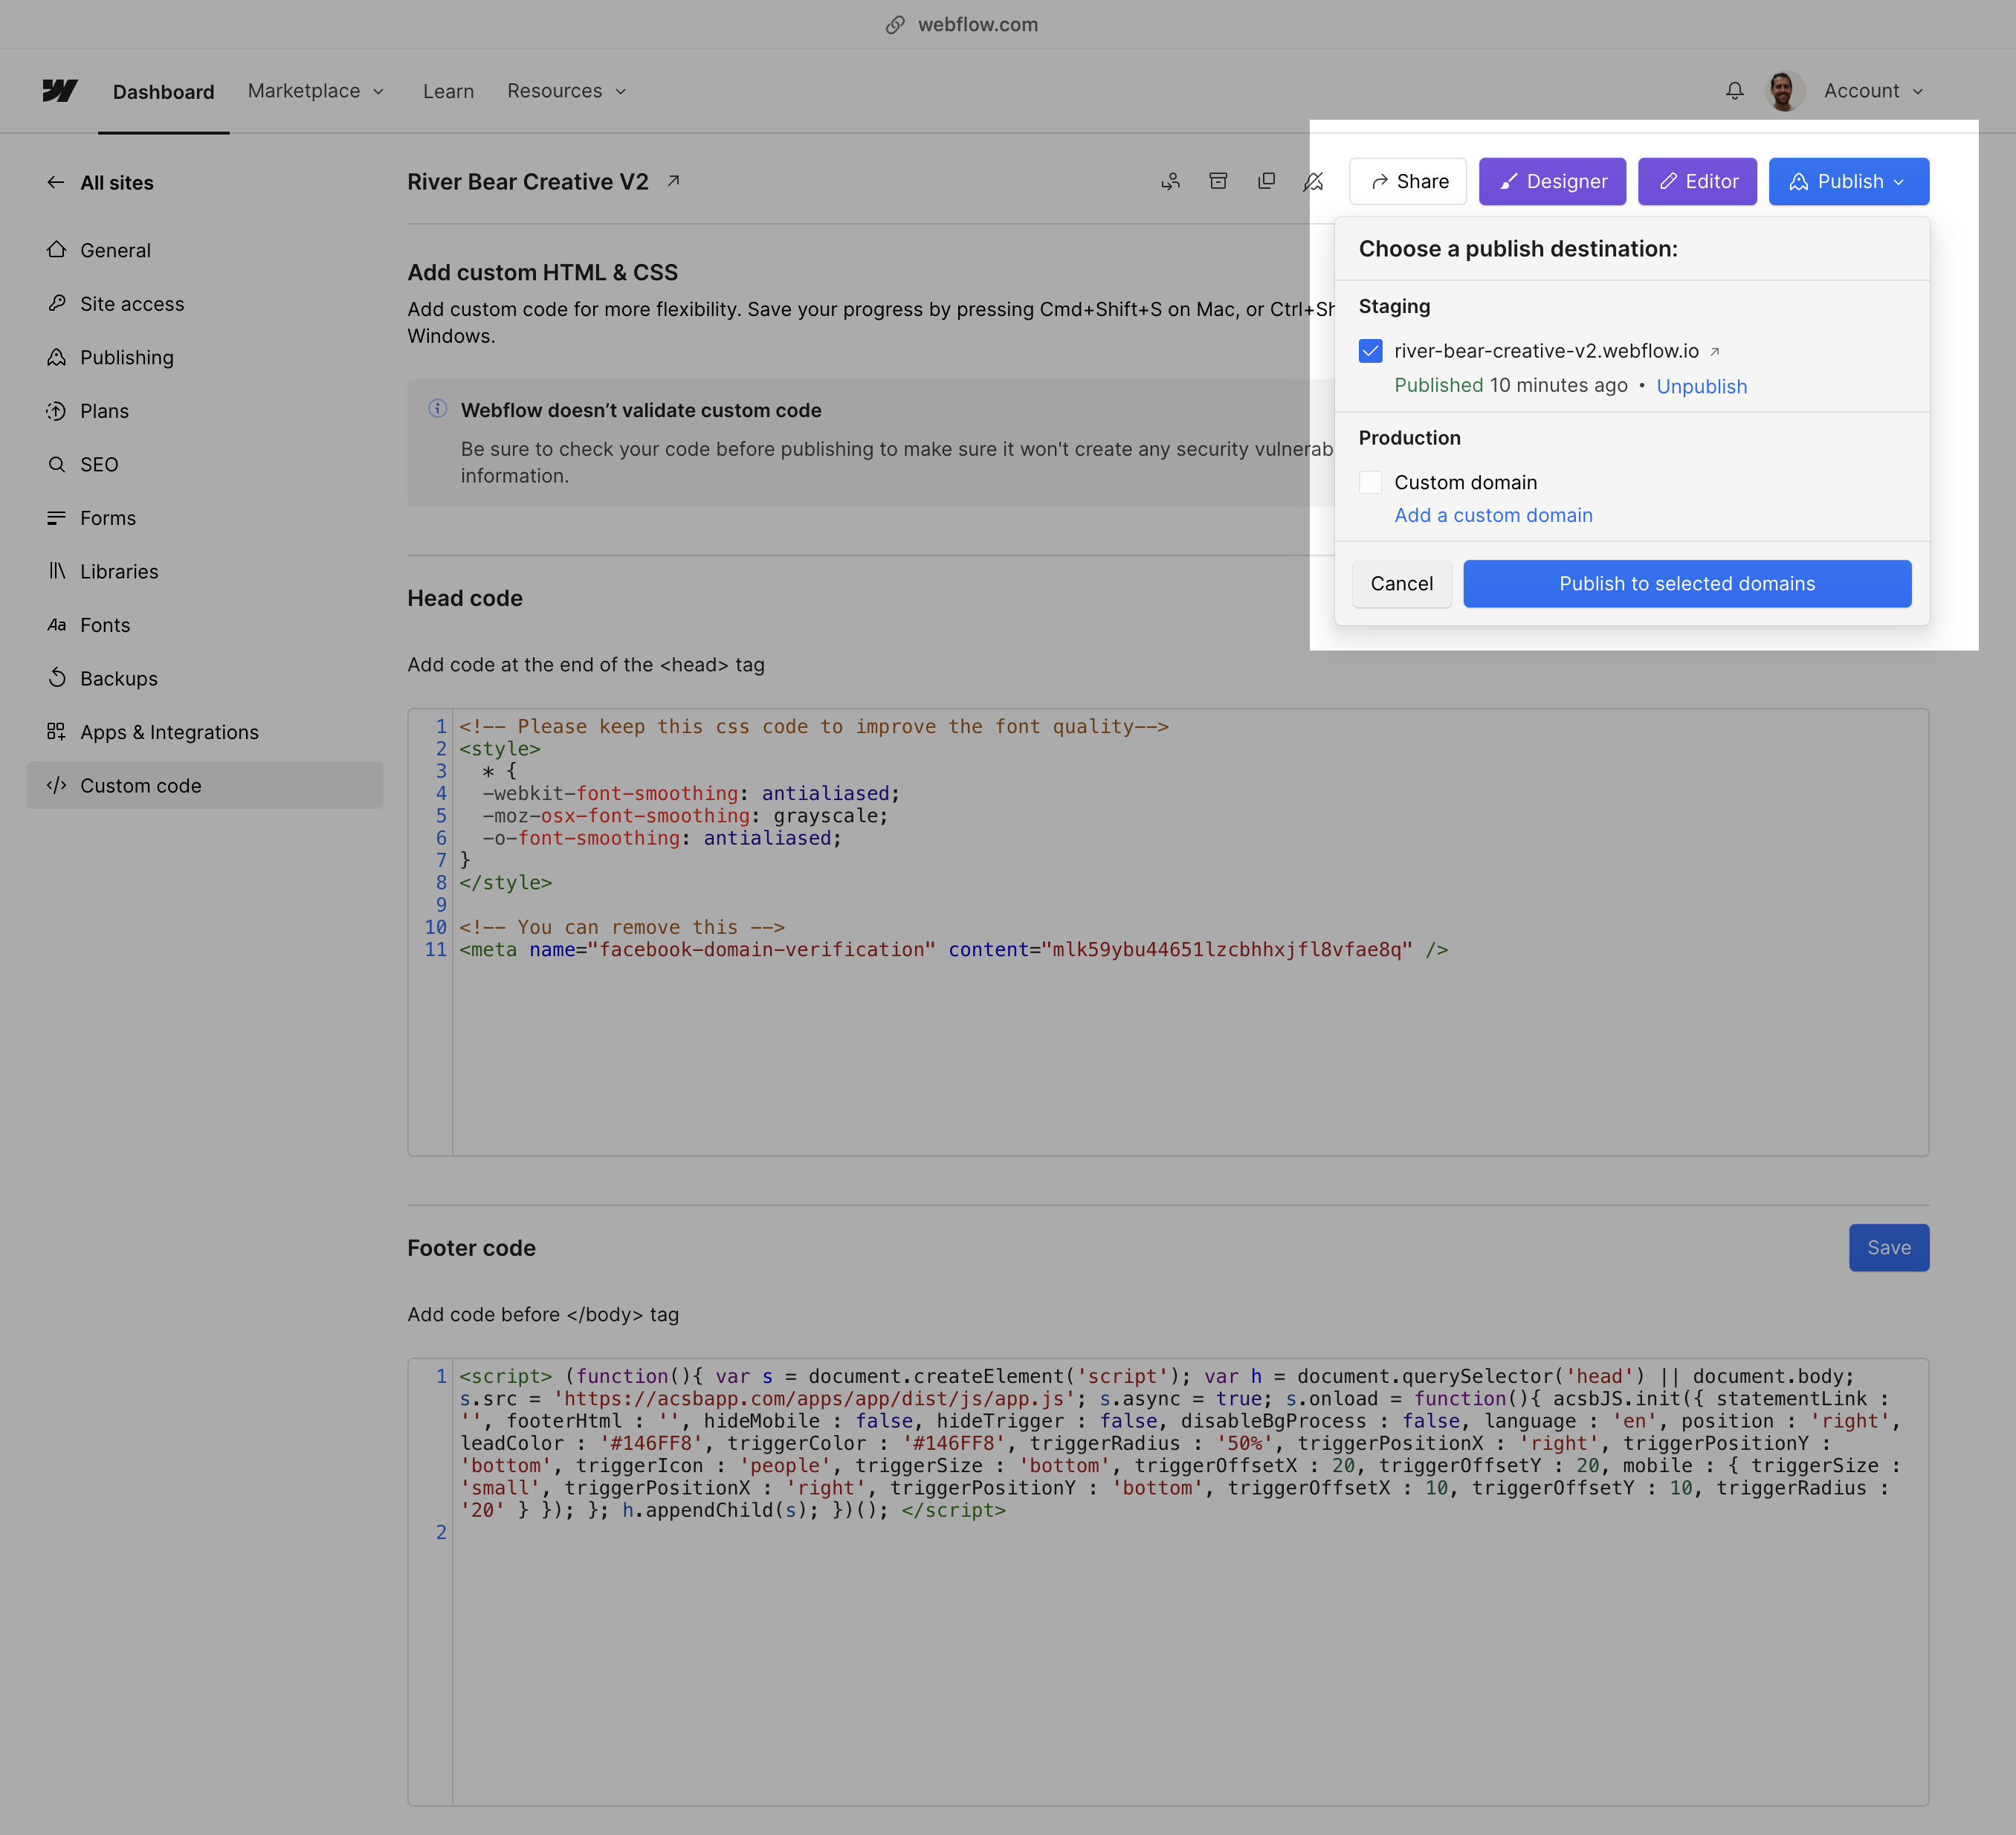
~9. Click "save" to save your changes, and then publish your website to activate the accessibility widget and start scanning your website for any accessibility issues.
~10. Finally, let's take a moment to kindly review the accessibility widget on your website, making sure it's easy to use and caters to the needs of all visitors.

